Android Basic Settings
Provides the method to generate a server key for Android push notifications.
Access Firebase Console and Create Project
- Access the Firebase console and complete project creation.
 [Figure 1] Access Firebase Console and Create Project
 [Figure 2] Create Project
Add Firebase Android App and Download Configuration File
- Add an Android app to the created project.
- Download the configuration file (google-services.json) and add it to the Unity project Assets folder.
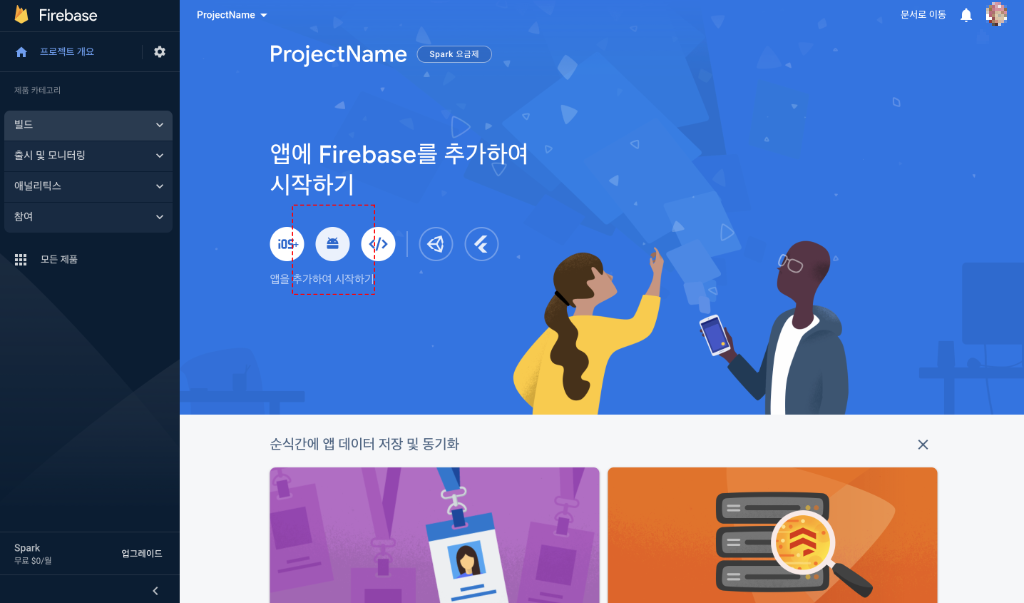 [Figure 3] Add Android App
 [Figure 4] Register App Information
 [Figure 5] Download Configuration File
Configure Firebase Account Key
- Navigate to Project Settings Cloud Messaging service.
- Select Manage Service Accounts and go to the project service account service.
- Select the registered service account and go to the key management service.
- Use Add Key to select Create New Key and generate a JSON file.
- Download the generated JSON file.
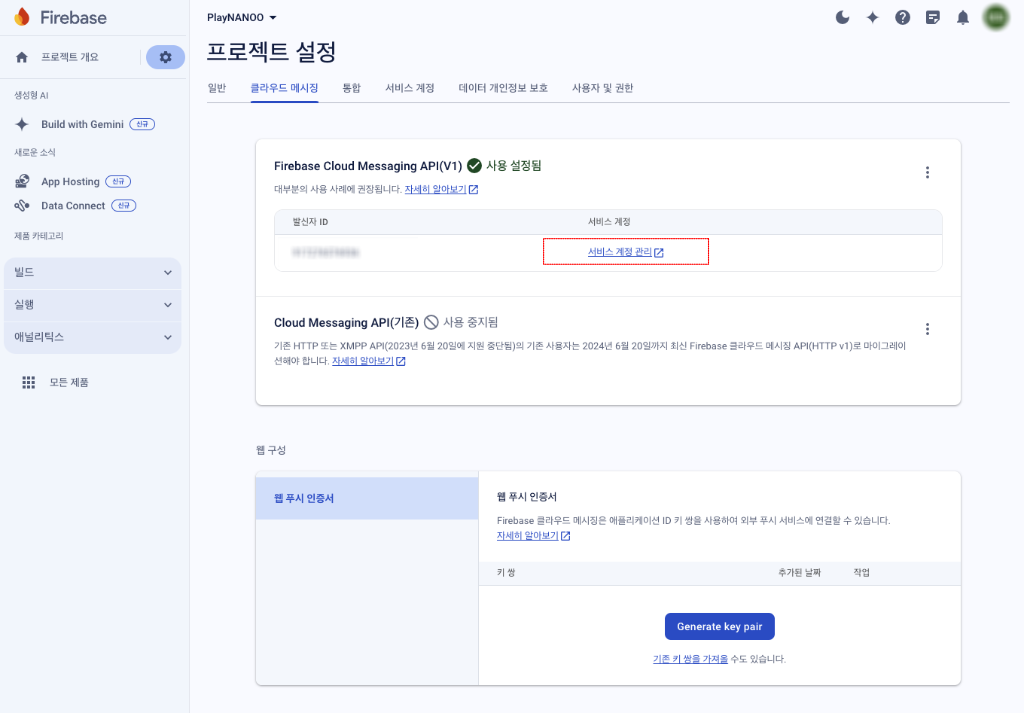 [Figure 6] Firebase Cloud Messaging Settings
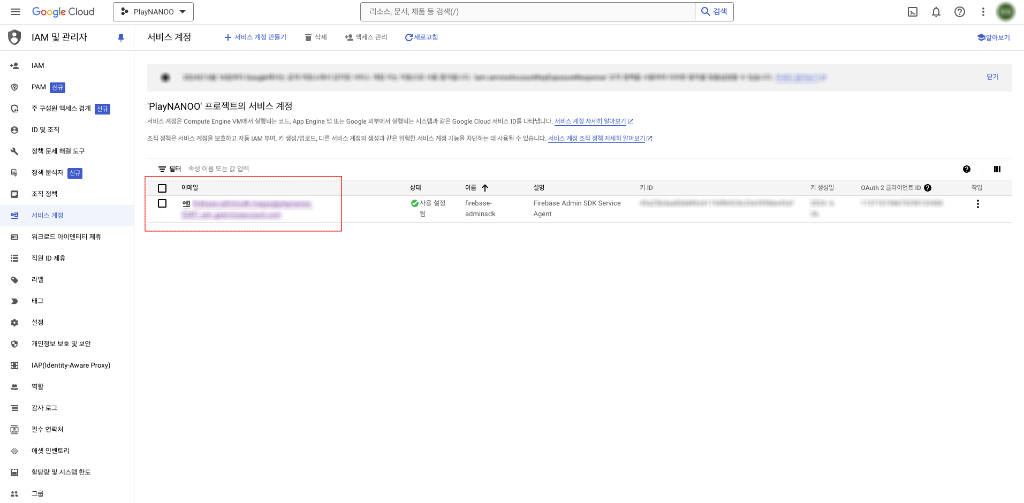 [Figure 7] Project Service Account Settings
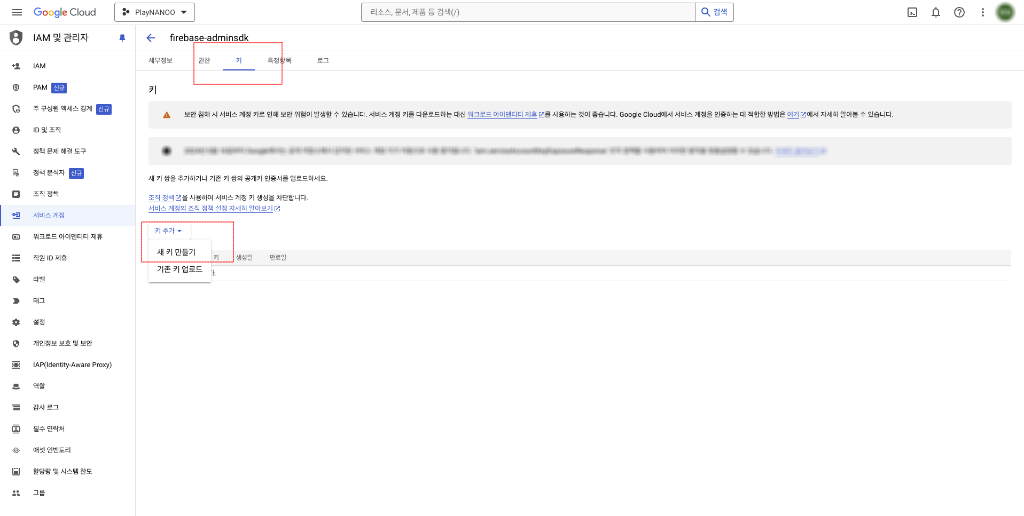 [Figure 8] Generate Project Service Account Key
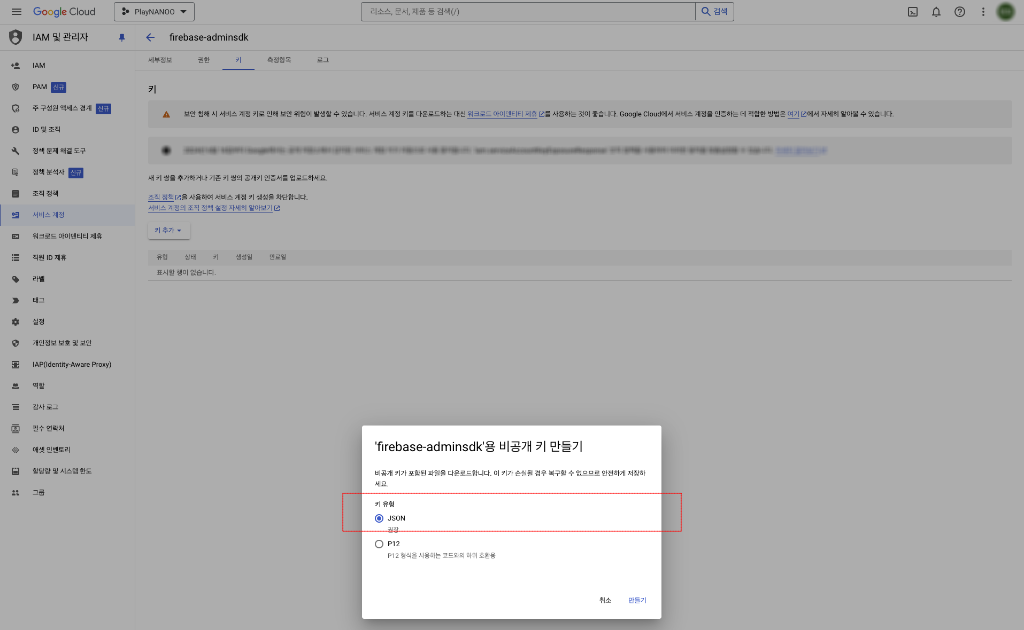 [Figure 9] Download Project Service Account Key JSON
Register Firebase Account Key
- Register the generated account key JSON file in PlayNANOO settings under Push Notification Management.
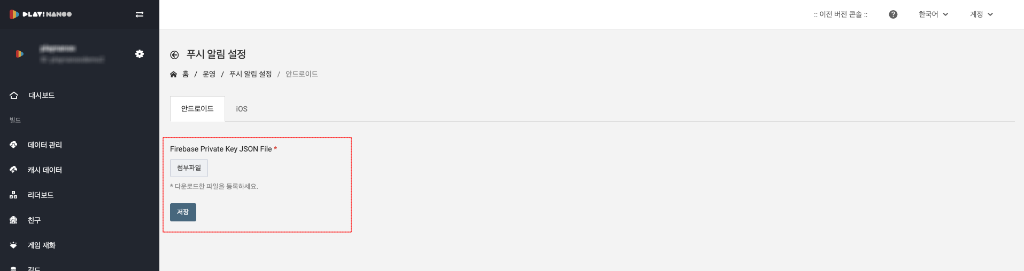 [Figure 10] Register Account Key in PlayNANOO Console
Download and Import Firebase Unity SDK
- Download the Unity SDK provided by Firebase and import FirebaseMessaging.unitypackage into your project.